Search for vocal plugins and you get a list of brands. That is not much use, because a vocal chain is not a shopping list, it is a sequence of six jobs done in a specific order. Get the order wrong and the best plugin in the world will not save it.
So here is the chain by job, what to reach for at each stage, and which decisions actually change the result.
The chain, in order
- Clean-up - rumble, hum, bleed
- Pitch correction - before anything squashes the dynamics
- Subtractive EQ - cut what is in the way
- Compression - two gentle stages beat one crushed one
- De-essing - after compression, because compression raises consonants
- Saturation, then effects on sends
That order is not a style choice. Each stage changes what the next one sees.
1. Pitch correction
This goes early, before compression, and the reason is mechanical: a pitch tracker finds note boundaries using the dynamics of the performance, and a compressor flattens exactly those dynamics. Tune a compressed vocal and the correction is measurably less stable.
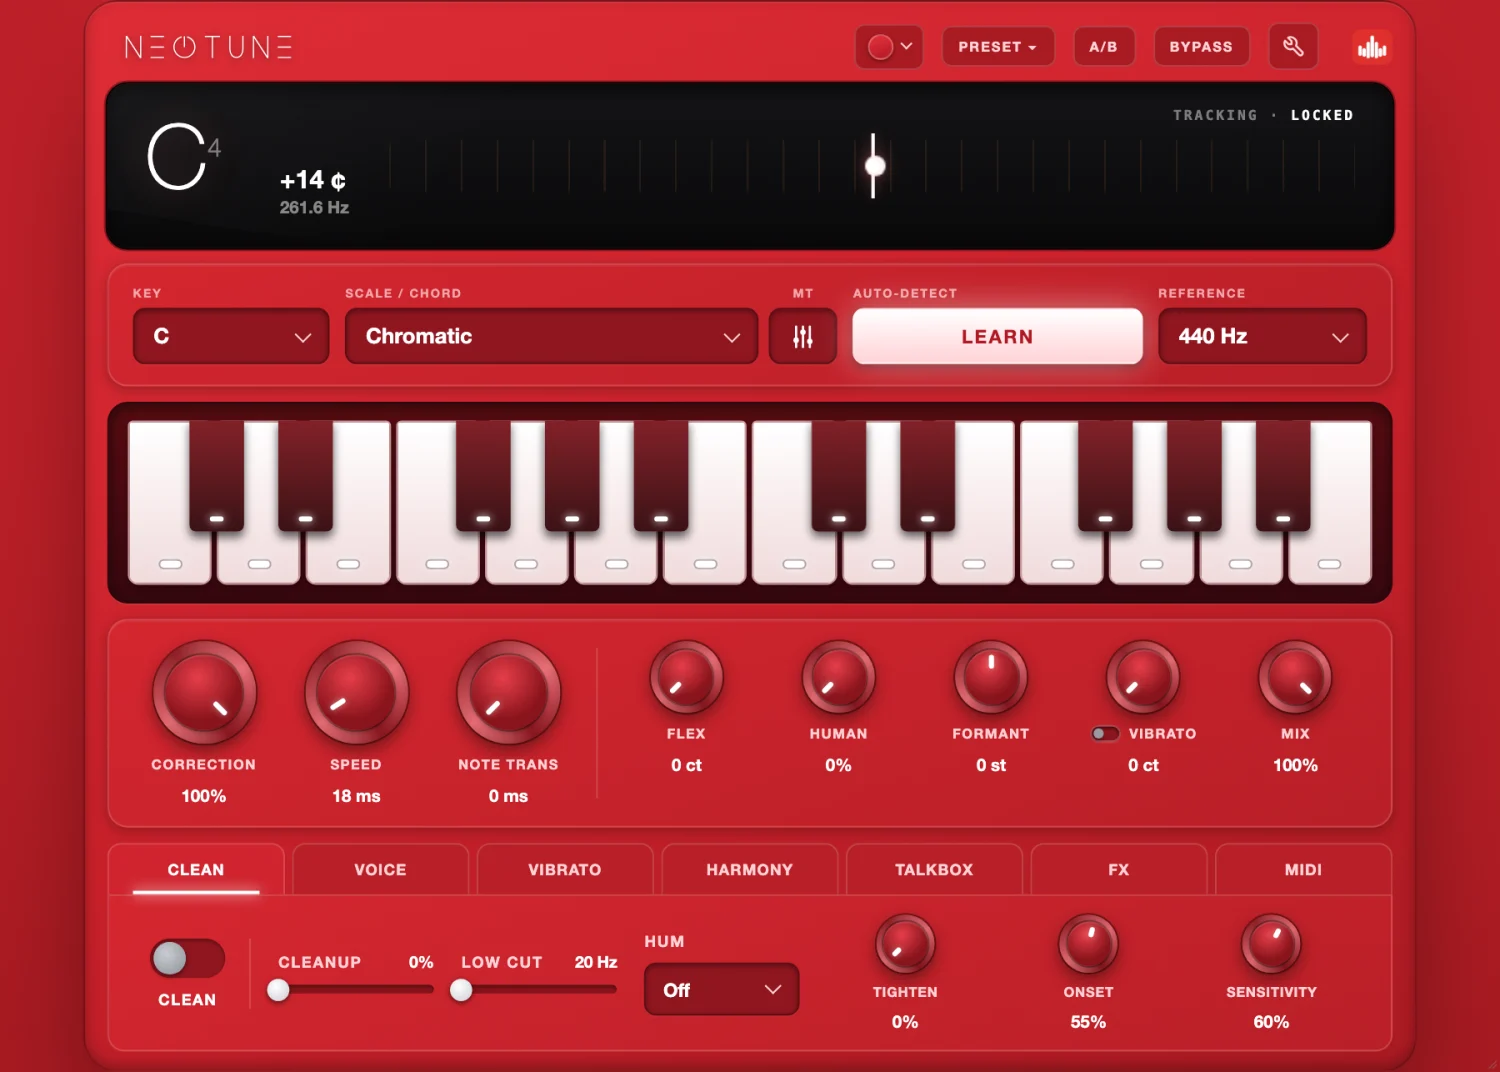
What separates tuners is not really the algorithm, it is how many decisions you get. A single "amount" knob has made four choices for you: how far to correct, how fast, what happens between notes, and how much of the singer's own movement to leave alone.
Our sister product NEOTUNE Pro splits those into five separate controls and adds a clean-up stage that runs before the pitch detection, which is where most warbling actually starts. It also carries 37 scales, 21 of them microtonal or non-Western, which matters if you work in maqam, raga or anything that is not twelve-tone equal temperament. It runs about $29.99.
Whatever you use, the rule is the same: tune on the isolated track, early, while you can still hear what you are doing.
2. Subtractive EQ
Cut before you boost, and cut before you compress. If a resonance is driving the compressor, the compressor is reacting to the resonance rather than to the performance.
- 200 to 400 Hz for mud and boxiness. Usually a 2 to 4 dB cut is the whole job.
- 500 to 900 Hz for honk and nasality.
- 2.5 to 4 kHz if the vocal is fatiguing rather than bright.
Sweep with a narrow boost to find what offends, then cut it with a wider Q. Those frequencies are where to start looking, not numbers to dial in. Your DAW's stock EQ does this perfectly well; a nicer one buys you a better display, not a better cut.
3. Compression, in two stages
One compressor doing 10 dB sounds like a compressor. Two doing 4 dB each sound like a vocal.
First, fast. Catch the peaks. Fast attack and release, 4:1 or higher, 3 to 5 dB on the loudest words.
Then, slow. Hold the vocal forward. Medium attack around 10 to 30 ms so consonants get through, slower release, 2:1 or 3:1, 2 to 4 dB fairly constantly.
Do not chase a universal threshold. Gain reduction depends entirely on your recorded level, which is why every number above is in dB of reduction rather than in threshold values.
4. De-essing
After compression, never before. Compression raises consonants relative to everything else, so a de-esser placed first is solving a problem that has not happened yet.
Set it with the full arrangement playing. Sibilance that sounds severe soloed often sits fine against hats, and sibilance that sounds fine soloed can be the only thing you hear in the mix. If saturation follows, check again afterwards, because distortion generates new high-frequency energy.
5. Saturation
Parallel, or low drive. The job is harmonic density so the voice survives a phone speaker, not audible distortion.
Send the vocal to a driven auxiliary, high-pass the return at 300 Hz and low-pass the fizz at 6 to 8 kHz, compress the return, and blend it underneath the clean track. You keep the clean consonants and gain the weight.
6. Doubling, harmony and effects
Doubles and harmonies belong after the tuning, not before, because anything that widens or smears the signal makes pitch detection less certain.
For harmony, the thing that matters is whether it is scale-aware. A fixed interval shifter moves every note by the same number of semitones, which will be wrong on roughly half the chords in a normal progression. Waves Harmony handles large arranged stacks, and NEOTUNE Pro carries two scale-aware voices plus a doubler if you would rather not add another insert.
Reverb and delay go on sends, filtered, with pre-delay so the dry consonant arrives first. Automated throws on phrase endings do more than a send running under the whole verse.
The five-minute check before you bounce
- Solo the vocal. If it drifts, fix it now, in the session.
- Check in mono. If the vocal disappears, sort the phase.
- Play it on a phone speaker. If you cannot make out a line, that is a midrange problem.
- Leave headroom. Peaks around -6 dBFS, nothing on the 2-bus.
The one thing none of these fix
Mastering works on the finished stereo file, so everything it does, it does to the whole song at once. That makes it very good at loudness, tonal balance and translation, and completely unable to retune a vocal, fix timing or lift a buried lead. There is no vocal track left to correct by then, only a mix that happens to contain one.
Which is the real argument for doing all six stages above properly: they are the part only you can do. If you want the boundary in more detail, mixing vs mastering covers it, and what LUFS to master to covers the numbers.
Once the vocal says what you want it to say, mastering is the step that makes it hold its own anywhere it plays.
NEOTUNE Pro and Sauce Mastering are both made by Producersources.